The Recycle Bin allows users to undo accidental deletions easily. This feature is especially useful because it provides a second chance to recover documents without requiring specialized software. However, this safety net only works under certain conditions.
Where Deleted Files Go
When you delete a document:
It is moved to the Recycle Bin.
The file remains in its original format and can be restored to its original location.
If the Recycle Bin is full, older items may be permanently removed to make space.
If you delete a file using Shift + Delete, or delete it from an external drive or network location, it bypasses the Recycle Bin entirely.
Understanding these nuances helps in determining whether your file can be recovered directly from the Recycle Bin or if additional recovery steps are needed.
Steps to Retrieve Deleted Documents from the Recycle Bin
Step 1: Open the Recycle Bin
To begin, navigate to the Recycle Bin:
Locate the Recycle Bin icon on your desktop.
Double-click the icon to open it.
If you can’t find it, press the Windows key, type “Recycle Bin,” and press Enter.
Once the Recycle Bin opens, you will see a list of deleted items, including documents, images, videos, and other file types.
Step 2: Search for Your Document
To make it easier to find the deleted document:
Use the search bar in the upper-right corner of the Recycle Bin window.
Type part or all of the document's name.
You can also click on the Date Deleted column to sort files by the date they were removed, making it easier to locate recently deleted items.
If you are unsure of the file name, try filtering by file type (e.g., .docx, .pdf, .txt).
Step 3: Restore the Document
Once you find the document:
Right-click the file.
Select Restore.
The document will be returned to the folder it was in before it was deleted. You can confirm this by going to that location and checking for the file.
Alternatively, you can:
Select multiple files by holding Ctrl and clicking on each.
Then right-click and choose Restore to return all selected files to their original locations.
What If the File Isn't in the Recycle Bin?
Sometimes, deleted documents may not appear in the Recycle Bin. Here are some possible reasons:
You emptied the Recycle Bin after deleting the file.
The document was too large for the Recycle Bin’s capacity and was permanently deleted.
The file was removed using Shift + Delete, bypassing the Recycle Bin.
The file was deleted from an external device or network location.
In such cases, your next steps involve more advanced recovery options.
Recovering Files After Emptying the Recycle Bin
If the Recycle Bin has been emptied, the file is marked as deleted but may still exist on the hard drive until overwritten. Here’s how you can attempt to recover it:
Option 1: Use File History (Windows Backup)
If you’ve enabled File History:
Open the folder where the file was originally located.
Right-click in the folder.
Select Properties > Previous Versions.
Browse through the available versions and select the one you wish to restore.
Click Restore.
File History must have been set up before deletion for this method to work.
Option 2: Use System Restore (For System Files)
While System Restore is typically used for system settings and software configurations, it may restore certain system folders that contained your documents.
Type “System Restore” into the Windows search bar.
Open Create a Restore Point.
In the System Protection tab, click System Restore.
Choose a restore point that predates the file’s deletion.
Follow the wizard to restore your system.
Note: This may affect applications and system settings but not necessarily personal files unless they were in system folders like Desktop or Documents.
Option 3: Use Data Recovery Software
If none of the above methods work, you can use third-party data recovery software to retrieve permanently deleted files:
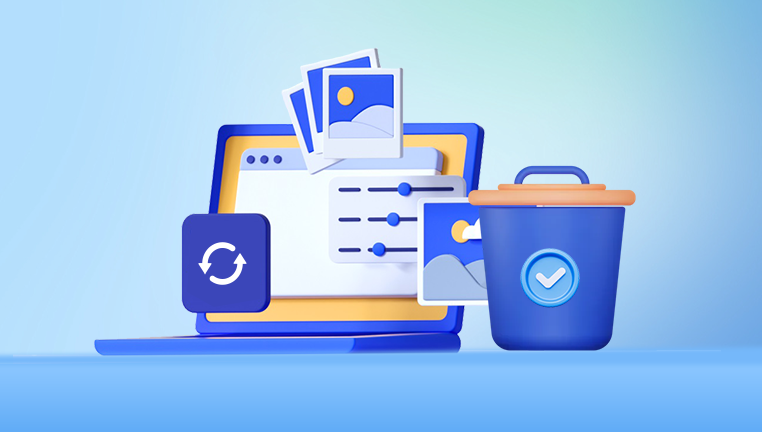
Drecov Data Recovery
When you delete a file in Windows, it typically goes to the Recycle Bin. But once you empty it, the document isn’t truly gone it’s just marked as free space. Drecov Data Recovery takes advantage of this by scanning your drive’s sectors for trace data and reconstructing the deleted files before they’re overwritten.
Getting started is simple. Download and install Drecov Data Recovery on a different drive than the one where the file was lost. Launch the program and choose the drive where the document was originally stored. Select “Deep Scan” for the most thorough results. Once the scan completes, browse through the list of recoverable files using filters for file type (like .docx, .pdf, or .txt) to locate your document. Preview the file if possible, then click “Recover” and choose a safe location to save it.
Drecov Data Recovery supports recovery from internal drives, external hard drives, USB sticks, and SD cards. It’s user-friendly and doesn’t require advanced technical skills, making it ideal for both casual and professional users.
Here’s a general outline of how to use these tools:
Download and install the recovery software.
Launch the software and select the drive where the file was deleted.
Start the scan to search for recoverable files.
Once the scan is complete, browse through the results to locate your file.
Select the file and click Recover, choosing a different drive or folder to save the restored document.
Make sure to avoid installing the software on the same drive where your lost files were located to prevent data overwriting.
Preventing Future Loss
Once you’ve successfully recovered your documents, consider the following tips to prevent similar incidents in the future:
Enable File History
Set up File History to back up your files automatically.
Go to Settings > Update & Security > Backup.
Click Add a drive and choose an external drive.
Turn on Automatically back up my files.
Use Cloud Storage
Store documents in cloud services such as OneDrive, Google Drive, or Dropbox. These platforms keep your files synced and often include file version history and trash/recycle features.
Increase Recycle Bin Size
Increase the allocated storage space for the Recycle Bin to reduce the risk of auto-deletion due to size limits:
Right-click the Recycle Bin icon.
Select Properties.
Choose the drive and adjust the Custom Size.
Apply the changes.
Avoid Using Shift + Delete
Refrain from using Shift + Delete unless you’re sure you want to permanently remove a file.
Regular Backups
Schedule regular system backups, either through Windows Backup or third-party solutions. This ensures your files are always retrievable even after major data loss.
Special Cases: External Drives and Removable Media
If you deleted a document from:
USB flash drives
External hard drives
Memory cards
…you may notice that the files do not appear in the Recycle Bin. This is because Windows bypasses the Recycle Bin when deleting files from removable media. If that’s the case:
Immediately stop using the drive to prevent data from being overwritten.
Use data recovery software specifically designed for external drives (e.g., Recuva Portable or PhotoRec).
Follow the same scanning and recovery process mentioned earlier.
Dealing with Corrupt Files in the Recycle Bin
Sometimes, a file may show up in the Recycle Bin but can’t be restored due to corruption or permission issues. If you encounter this:
Right-click the file and try Restore again.
If it fails, try dragging the file to a different folder manually.
If it still doesn’t work, use a file repair tool like Hetman File Repair, Stellar File Repair, or Repair Toolbox to attempt to fix the document after recovery.
Restoring Files with Command Prompt
For tech-savvy users, you can use Command Prompt to attempt file recovery if you know the approximate location:
Open Command Prompt as Administrator.
Type the command:
bash
CopyEdit
attrib -h -r -s /s /d X:\*.*
Replace X with the drive letter.
This command makes hidden and system files visible, which may include deleted files that weren’t overwritten yet.
What to Do If Recovery Fails
If your file is not in the Recycle Bin and software solutions fail:
Consider contacting a professional data recovery service.
Avoid writing any new data to the affected drive.
Disconnect the drive and use a write blocker if possible.
Professional recovery services often use hardware-level tools and cleanroom environments to retrieve data from failing or corrupted drives.
Retrieving deleted documents from the Recycle Bin is a simple task under normal conditions, but when complications arise, knowing the right steps to take becomes critical. Here's a quick recap of the process:
Check the Recycle Bin.
Use the search function and restore the document.
If not found, use File History or data recovery software.
Avoid overwriting deleted data.
Implement prevention measures such as backups and cloud storage.
With the right knowledge and tools, the loss of a document doesn’t have to be permanent. By understanding how the Recycle Bin works and knowing how to navigate both basic and advanced recovery methods, you can confidently manage data loss incidents and maintain control over your digital files.