Videos hold more than just pixels they preserve memories, moments, professional projects, and sometimes irreplaceable content. Whether it's a wedding recording, surveillance footage, YouTube project, or a business presentation, a corrupted video file can feel like a disaster. But video file corruption isn’t necessarily the end. In many cases, it’s possible to repair, recover, or even restore partially damaged files using both built-in operating system features and specialized third-party tools.
Common Causes:
Interrupted Recording – Sudden power loss, battery depletion, or accidental device ejection mid-recording.
File Transfer Errors – Disconnection during data transfer can result in incomplete or unreadable files.
Faulty Storage Devices – Bad sectors or physical damage on memory cards, hard drives, or USBs.
Virus/Malware – Some malicious software targets multimedia files and either encrypts or corrupts them.
Unsupported Codecs – Playing or converting videos using incompatible or outdated codecs may damage file structure.
Software Crashes – Editing or processing software crashes can leave partially written or broken files.
Improper Shutdown – Sudden shutdown or crashes during editing or playback.
Knowing the source helps you pick the right recovery method. For example, a file partially transferred due to a damaged SD card might still be fully restorable with sector-based scanning, while a file that closed improperly may just need header repair.
Recognizing a Corrupted Video File
How do you know a video file is corrupted? Not all damage is obvious—some files may appear intact but have underlying playback issues.
Signs of Corruption:
File doesn’t open at all.
Video opens, but playback is black or stuck.
The file plays without audio or with distorted sound.
The player shows “unsupported format” or “can’t read file.”
The file has zero bytes or incomplete size.
Glitches like broken frames, freezing, or skipping.
Metadata is missing or unreadable.
Before attempting recovery, confirm the file isn’t just incompatible with your media player. Try opening it with different software like VLC Media Player or MPC-HC. If multiple apps can’t read the file, corruption is likely.
Method 1: Use VLC Media Player to Repair Video Files
One of the best-known free tools for video repair is VLC Media Player, especially for AVI files. It can fix damaged indexes and rebuild playable files.
Steps to Repair AVI with VLC:
Open VLC Media Player.
Click Media > Convert/Save.
Add your corrupted video file.
Click the arrow next to Convert/Save, then choose Convert.
Choose a codec (e.g., H.264 + MP3 for MP4).
Set a destination file name.
Start the conversion process. If successful, it will output a playable version.
For AVI-specific issues:
Go to Tools > Preferences.
Under Input/Codecs, find Damaged or incomplete AVI file.
Set it to Always fix.
Open the corrupted file. VLC will try to fix the index on load.
Pros:
Free and widely available.
Supports many formats.
Cons:
Limited to minor index corruption.
Doesn’t repair serious structural damage.
Method 2: Use Professional Video Repair Software
When VLC fails, dedicated video repair tools can tackle deeper corruption.
Popular Software:
Stellar Repair for Video
Wondershare Repairit
Yodot MOV Repair
Remo Repair MOV
Kernel Video Repair
These tools are built to:
Repair header damage
Restore missing frames
Fix audio-video sync
Rebuild corrupted containers (MP4. MOV, AVI, MKV, etc.)
Support batch processing
How It Works:
Download and install your preferred video repair software.
Launch the app and upload the corrupted file.
If needed, add a sample file (a working file from the same camera/format).
Click Repair or Start.
Preview the repaired file.
Save to a new location.
Pros:
Handles severe corruption.
Repairs multiple file formats.
Easy to use with GUI.
Cons:
Most have limited features in free versions.
Full recovery often requires a paid license.
Method 3: Restore Video from Backup or Previous Versions
Sometimes the simplest solution is to go back in time.
On Windows:
Right-click on the video file or its folder.
Select Properties > Previous Versions.
Browse available versions (requires File History or System Restore).
Choose and restore an earlier, uncorrupted version.
On macOS (Time Machine):
Open the folder where the video was saved.
Launch Time Machine.
Use the timeline to locate the uncorrupted version.
Click Restore.
Cloud Backup:
If you use OneDrive, Google Drive, Dropbox, or iCloud:
Check the file's version history.
Restore or download an earlier version.
Pros:
Fast and reliable.
No third-party software needed.
Cons:
Requires prior setup or active backup.
Doesn’t help if corruption occurred before backup.
Method 4: Recover Deleted or Lost Video Files (Before They’re Corrupted)
Sometimes videos appear corrupted because they were only partially recovered or are fragments of lost files.
Tools for Deep Recovery:
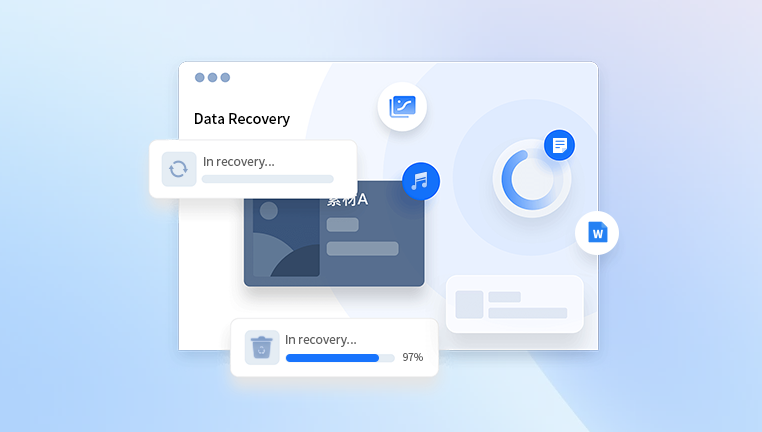
When your video files become corrupted whether from a sudden shutdown, failed transfer, or damaged storage device Panda Video Recovery offers a fast and efficient way to restore them. Designed with both beginners and professionals in mind, Panda’s intelligent recovery engine repairs damaged video files across a variety of formats, including MP4. MOV, AVI, and MKV.
Key Features:
Smart Video Repair: Analyzes and rebuilds damaged file structures, headers, and video frames.
Wide Format Support: Fixes videos recorded on phones, cameras, drones, and surveillance systems.
Sample File Matching: Uses a healthy file from the same device to improve the accuracy of the repair.
Batch Repair: Recover multiple corrupted videos at once with minimal effort.
Preview Before Save: Watch a preview of the repaired video to ensure quality before saving it.
How to Repair a Corrupted Video with Panda:
Download and install Panda Video Recovery on your PC or Mac.
Open the software and select “Video Repair” mode.
Add your corrupted video file, and optionally upload a sample (non-corrupted) video of the same format.
Click “Repair” and let Panda scan and fix the file.
Once the process completes, preview the repaired video and choose a safe location to save it.
These tools can:
Perform deep scans on drives, SD cards, USB sticks.
Reconstruct deleted or lost files.
Recover videos by file signature (e.g., .mov, .mp4. .avi).
Steps:
Download and install the recovery software.
Choose the drive where the video was stored.
Perform a deep scan or sector-level scan.
Locate and preview video files.
Save recovered files to a different location.
Pros:
Good for files deleted or lost after format or crash.
Can sometimes recover video fragments.
Cons:
May return partially corrupted or incomplete videos.
Larger files are less likely to be fully intact.
Method 5: Hex Editor Repair (Advanced Users)
If you're technically inclined, you can try using a hex editor (e.g., HxD, 010 Editor) to manually repair a file.
What It Involves:
Opening the corrupted file in a hex editor.
Comparing it to a working file from the same camera/device.
Copying header and footer metadata from the good file to the corrupted one.
Saving and testing the file in VLC.
Warning:
This method is risky and should only be used by experienced users.
One wrong byte can worsen the corruption.
Method 6: Use FFmpeg to Rebuild Video Files
FFmpeg is a command-line tool that can convert, stream, and fix broken video files.
Fixing Corrupted MP4:
bash
CopyEdit
ffmpeg -i corrupted.mp4 -c copy fixed.mp4
For missing or broken moov atom (common in MP4/MOV):
Try rewrapping the file:
bash
CopyEdit
ffmpeg -i broken.mov -movflags +faststart -c copy repaired.mov
Pros:
Free and powerful.
Supports almost all video formats.
Cons:
No GUI; command-line knowledge required.
May not fix severely damaged files.
Method 7: Restore from Camera Cache or Application Temp Files
Some cameras or editing software (like GoPro, Adobe Premiere, DaVinci Resolve) store temporary versions or cache files.
Steps:
Open the application’s temporary or autosave folder.
Look for files with names like temp.mov, autosave.mp4. or similar.
Copy them to a safe location.
Try opening in VLC or converting with FFmpeg.
Locations:
GoPro: .lrv (low-resolution preview) files may be usable.
Premiere Pro: Auto-Save folder inside the project directory.
OBS or screen recorders: check the default recording directory.
File Types and Compatibility
Certain formats are more prone to corruption. Here’s what to watch for:
MP4 / MOV:
Uses moov atom metadata.
Easily corrupted if recording is interrupted.
Tools like FFmpeg and Repairit work well.
AVI:
Index-based; vulnerable to fragmentation.
VLC and VirtualDub can help.
MKV:
Tolerant of corruption but still breakable.
Try remuxing with MKVToolNix.
3GP / MTS / MXF:
Often used in mobile and professional cameras.
May require proprietary software to repair.
Always know the codec and container format before attempting recovery.
Preventing Future Video File Corruption
While not all data loss can be avoided, smart practices can drastically reduce the risk.
Best Practices:
Safely Eject Devices – Always eject memory cards and USBs properly.
Avoid Overfilling Drives – Full memory can lead to incomplete file writes.
Use Reliable Hardware – Invest in quality SD cards, SSDs, and storage systems.
Keep Batteries Charged – Prevent mid-recording shutdowns.
Backup Regularly – Use cloud storage or local RAID systems.
Save Intermediate Edits – During video editing, save versions often.
Don’t Force Quit Software – Let processes finish before exiting.
Install Antivirus Software – Protect your files from malware-related corruption.
Losing access to a video file can be incredibly stressful—but it’s not always permanent. In many cases, especially when the file corruption is mild or the damage is structural (e.g., missing headers), you can use free tools like VLC or FFmpeg. For more serious corruption, professional-grade software like Stellar Repair or Wondershare Repairit can provide a second chance. And when all else fails, expert data recovery services may still pull your memories back from the brink.
Ultimately, the best recovery strategy is preparation. By practicing good data hygiene, using dependable storage, and creating regular backups, you can minimize both the occurrence and impact of video corruption—and keep your memories and projects safe for years to come.