Accidentally deleting pictures from a USB flash drive can be a distressing experience, especially if those pictures are important or irreplaceable. However, with the right tools and techniques, it's often possible to recover deleted photos from a USB drive. This article will guide you through the process of recovering deleted pictures from a USB flash drive.
1. Stop Using the USB Drive
The first and most crucial step in recovering deleted pictures from a USB flash drive is to stop using the drive immediately. Every time you save new data to the drive, there's a risk of overwriting the space where your deleted pictures were stored. This makes them harder to recover.
2. Check the Recycle Bin or Trash
If you're using a Windows computer, the first place to look for deleted pictures is the Recycle Bin. To access the Recycle Bin, simply double-click on the icon on your desktop or search for it in the Windows search bar. Once you open the Recycle Bin, you can browse through the files and restore any that you wish to recover.
For Mac users, the Trash is the equivalent of the Recycle Bin. You can access it by clicking on the Trash icon in the dock or by searching for it in the Spotlight search.
3. Use File Recovery Software
If the pictures are not in the Recycle Bin or Trash, or if you've emptied them, you can use file recovery software. These programs can scan your USB drive for deleted files and attempt to recover them.The following is an example of Panda data recovery operation.
USB flash drive recovery steps:
Step 1: Select USB flash drive/memory card recovery
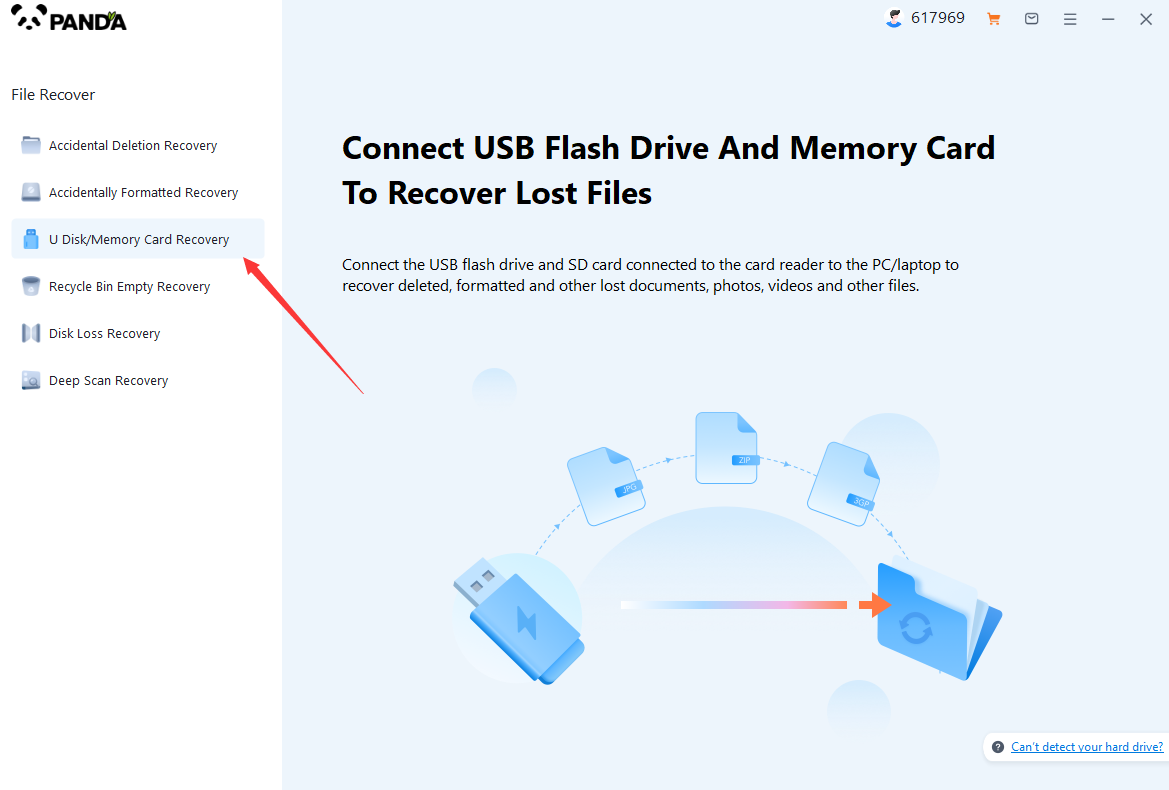
Choose the option that suits us more "USB flash drive/memory card recovery".
Step 2: Select USB flash drive
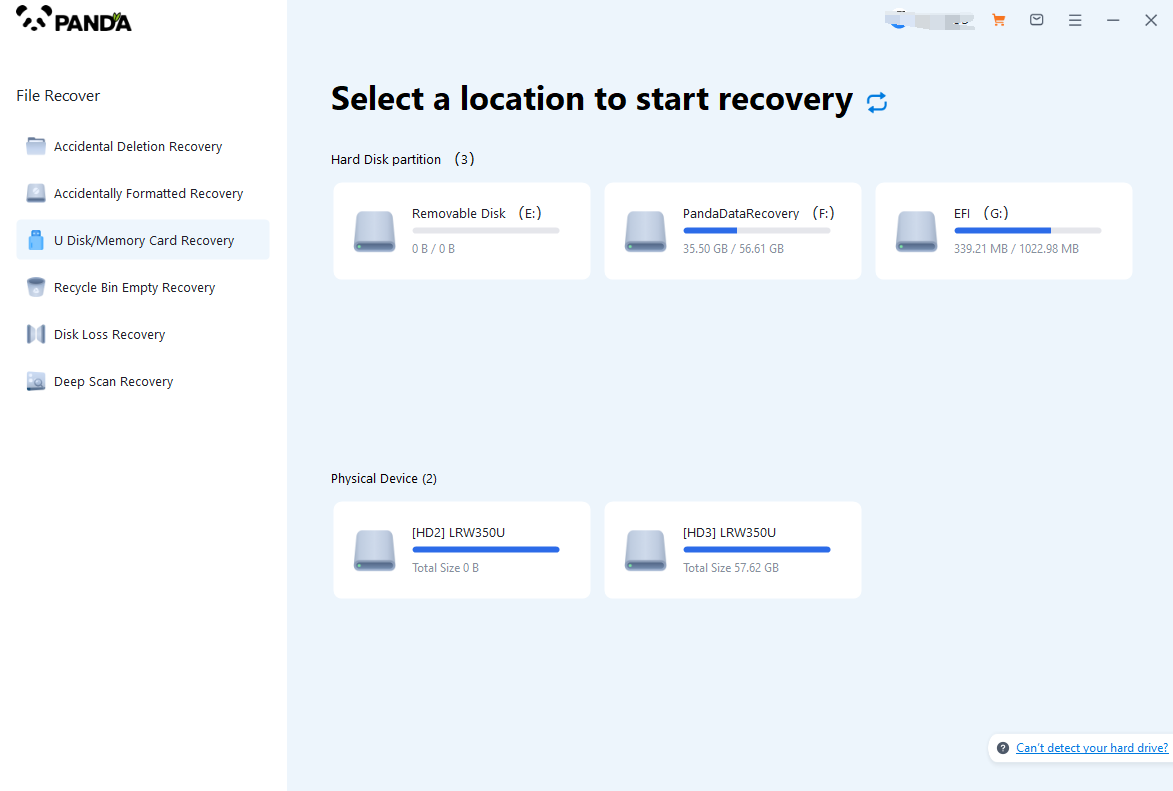
Insert the USB flash drive into the computer in advance, then select the USB flash drive and click Start Scanning.
The third step is to scan the USB flash drive

You need to be patient during the USB flash drive scanning process.
Step 4: Find the file
The files you want to recover can be found after the scan is completed, and you can find them by the file type, search name, etc.
Step 5: Preview
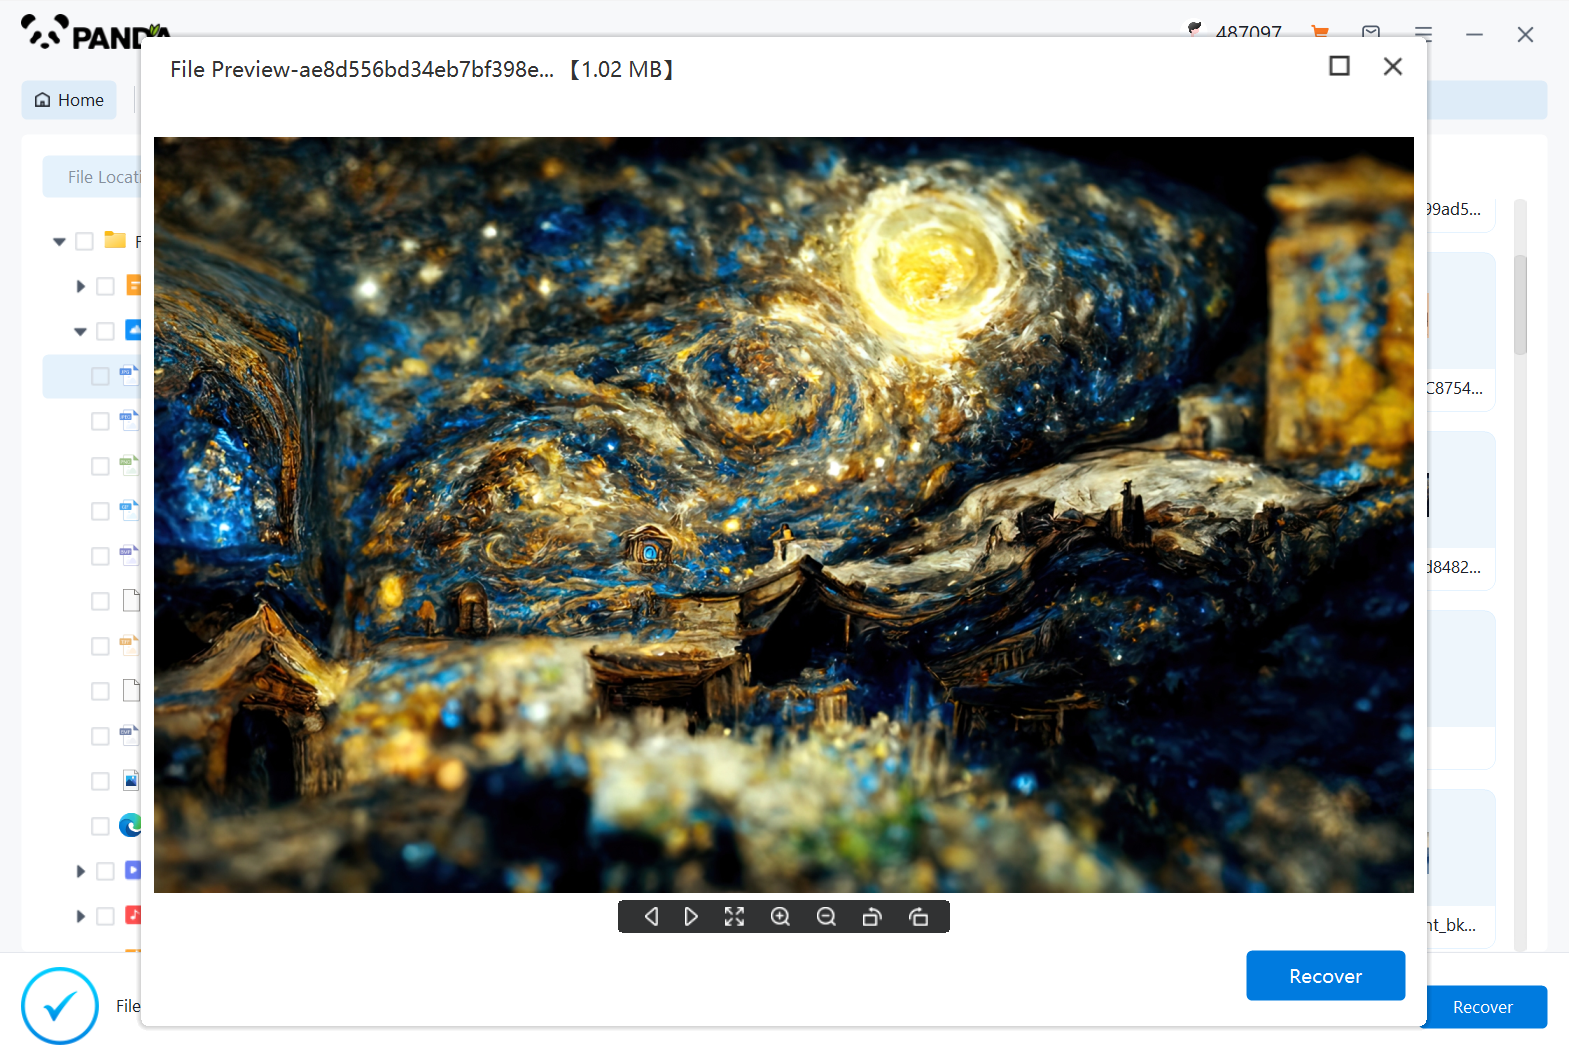
Double-click to preview the file to make sure the file is correct and it can be recovered, if the file preview fails, it may be that the file is damaged.
Step 6: Recover the files
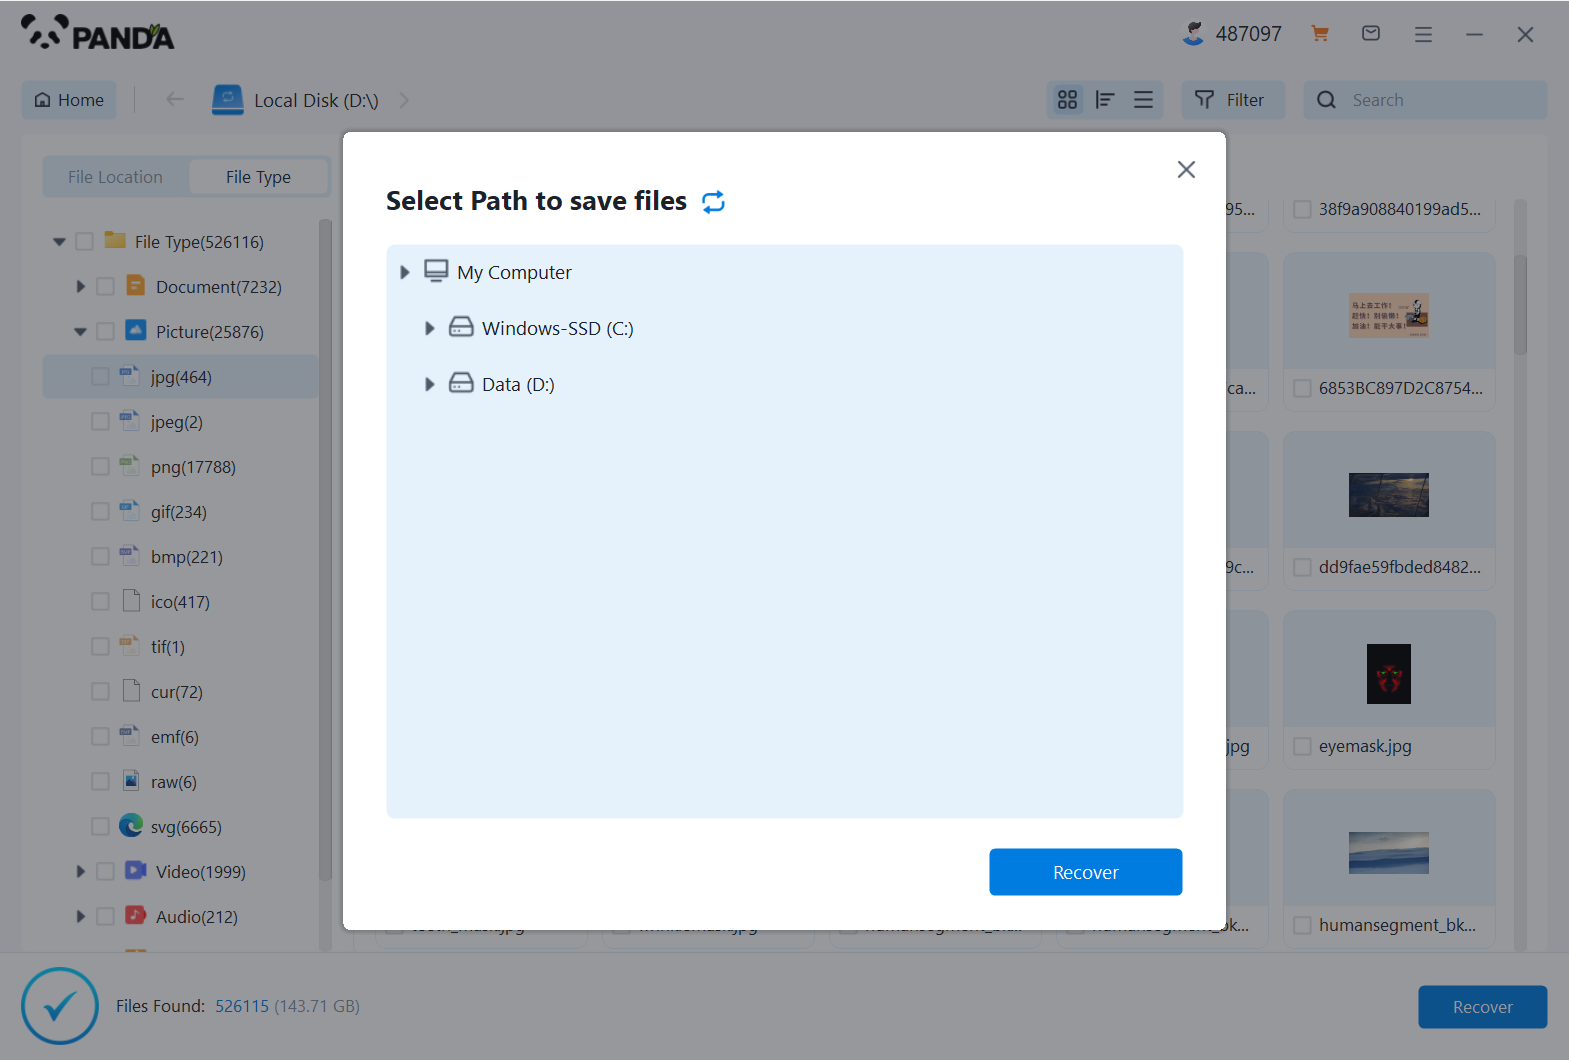
Tick the files you want to recover and click Recover to do it.
Please note that do not save the recovered files to the USB flash drive itself during the recovery process, so as not to overwrite the original data.
4. Contact a Professional
If the software is unable to recover your pictures, or if the pictures are critical and you're not comfortable performing the recovery yourself, you may want to consider professional data recovery services. These services can be more expensive but offer a higher success rate for recovering deleted files, especially from physically damaged drives.
5. Prevent Future Data Loss
To avoid losing important pictures in the future, it's essential to establish good data management habits:
- Regularly back up your files to an external hard drive, cloud storage, or a network location.
- Be cautious when deleting files and double-check to ensure you're selecting the correct items.
- Consider using a file recovery software as a preventive measure, so you can quickly recover any accidentally deleted files.
Conclusion:
Recovering deleted pictures from a USB flash drive is often possible, especially if you act quickly and avoid using the drive to prevent overwriting the deleted data. By checking the Recycle Bin or Trash, utilizing file recovery software, and considering professional help, you can increase your chances of successfully retrieving your lost photos. Remember to back up your data regularly to prevent future data loss.


