The Recycle Bin in Windows 10 serves as a temporary storage for deleted files and folders, allowing users to restore them if needed. However, once the Recycle Bin is emptied, the files are removed from the system and can become difficult to retrieve. While it's not possible to directly "restore" the Recycle Bin itself after it's been emptied, you can attempt to recover the deleted files from within the Recycle Bin or using other methods. Here's how:
1. Check for Recently Deleted Files in the Recycle Bin
Before proceeding with more advanced methods, it's worth double-checking the Recycle Bin for any recently deleted files that may still be present. Sometimes, files may remain in the Recycle Bin even after an emptying operation, especially if the emptying process was interrupted.
- Open the Recycle Bin by double-clicking on its icon on the desktop or navigating to it through File Explorer.
- Scroll through the contents of the Recycle Bin and look for the deleted files you want to restore.
- If found, right-click on the files and select "Restore" to return them to their original locations.
2. Use File History (If Enabled)
If you have File History enabled on your Windows 10 system, you can use it to restore deleted files from previous versions of your folders. File History creates backups of your files over time, allowing you to retrieve older versions.
- Open File History by searching for "File History" in the Start menu or Settings.
- Select the folder that contained the deleted files and click on "Restore personal files."
- Choose the date and time when the files were last known to be present and select the files you want to restore.
- Click on "Restore" to restore the files to their original location.
3. Employ Data Recovery Software
If the files are not present in the Recycle Bin or File History, you can try using data recovery software to attempt to recover the deleted files. These tools scan your computer's hard drive and attempt to recover deleted files, including those that were previously in the Recycle Bin. The following takes the operation of Panda data recovery software as an example.
Recycle Bin Data Recovery Steps:
Step 1: Select "Accidentally Empty Recycle Bin Recovery".
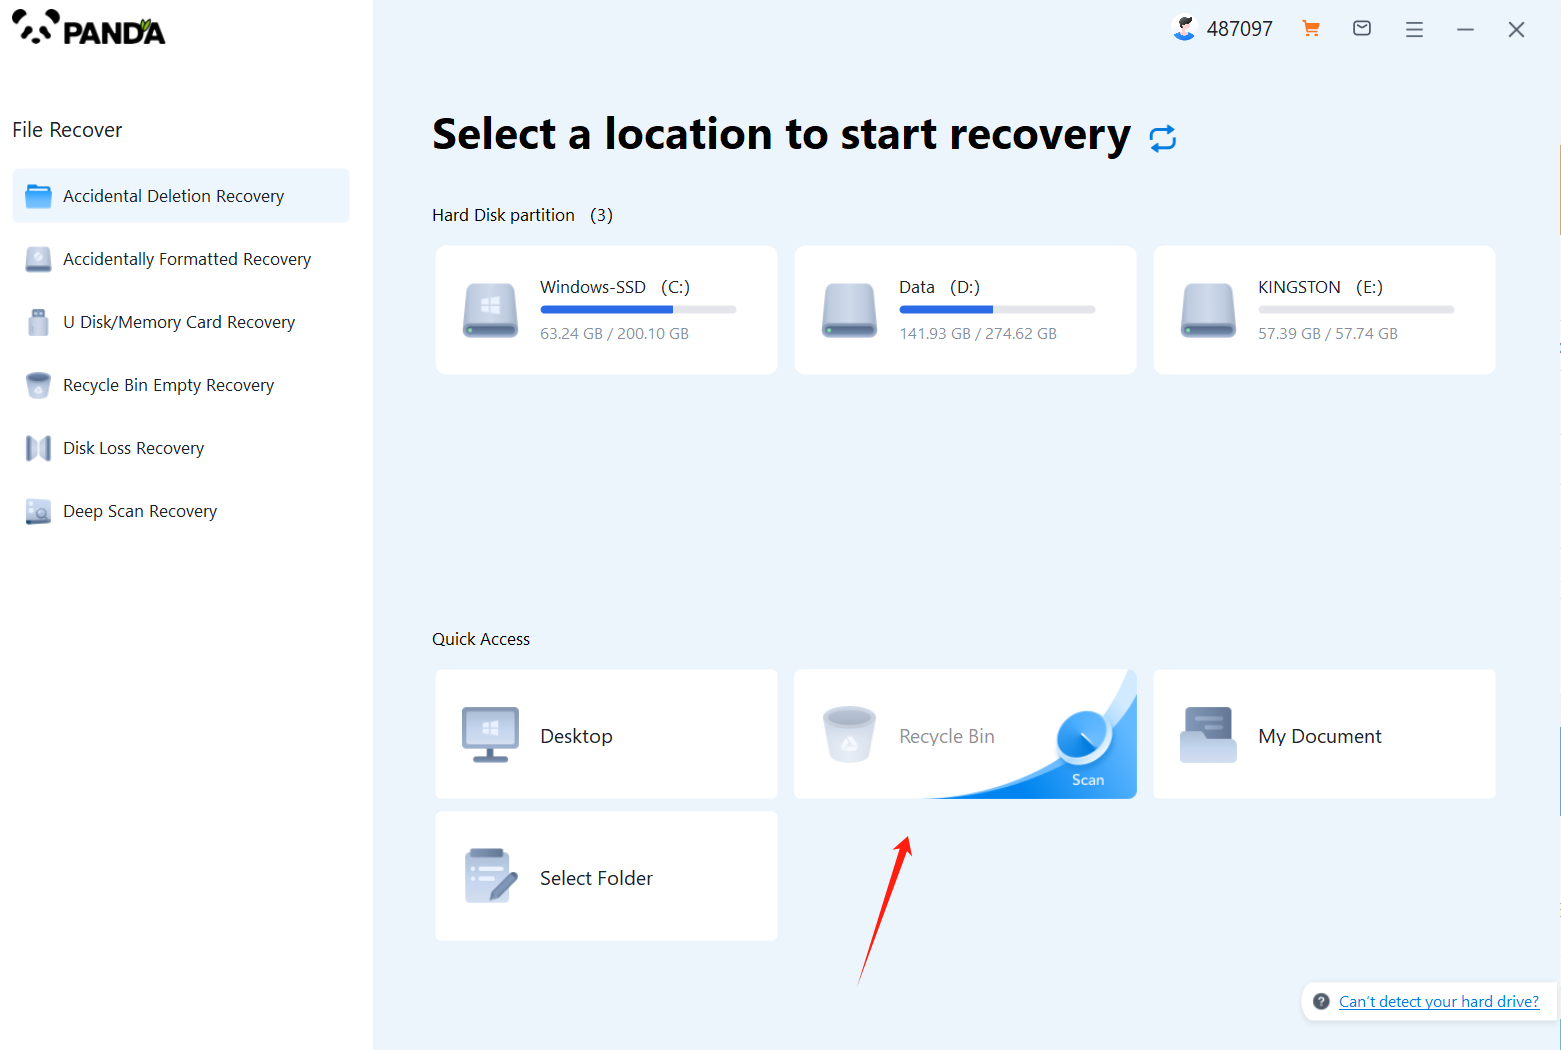
After opening the Panda data recovery, select "Accidentally Emptied Recycle Bin Recovery" and click to enter the next step.
Step 2: Select the disk where the recycle bin is being emptied and click Start Scan.
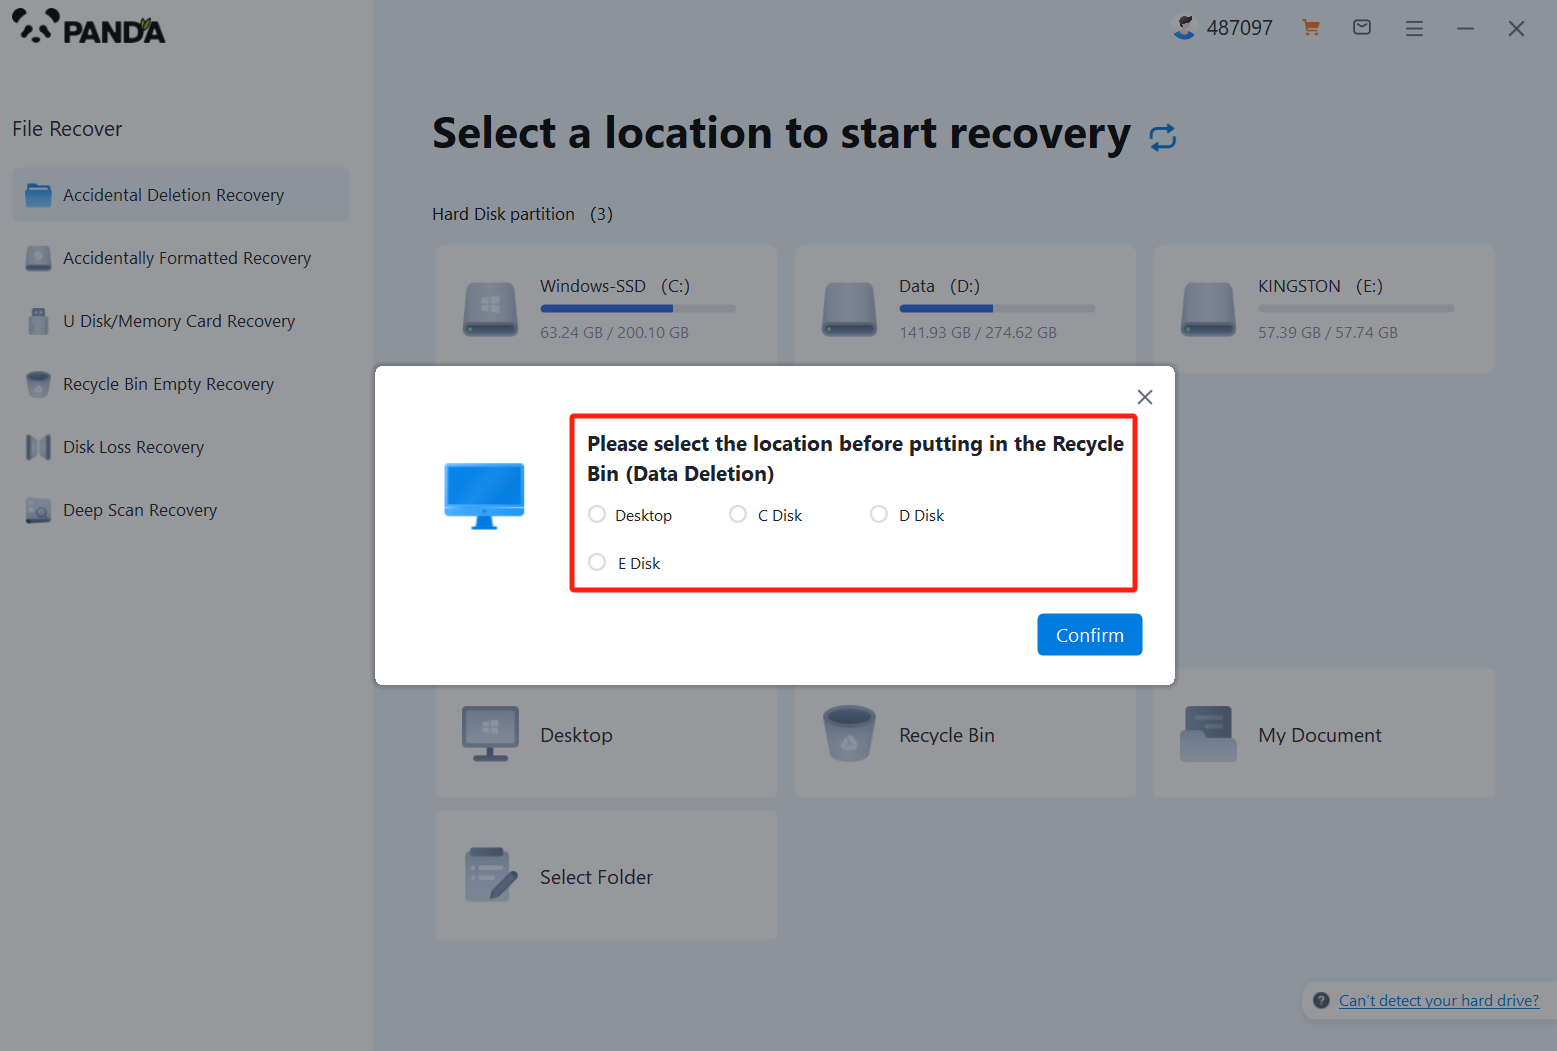
Usually our recycle bin is in the C drive, of course, it does not refer to all, click to start scanning.
Step 3: Find the file
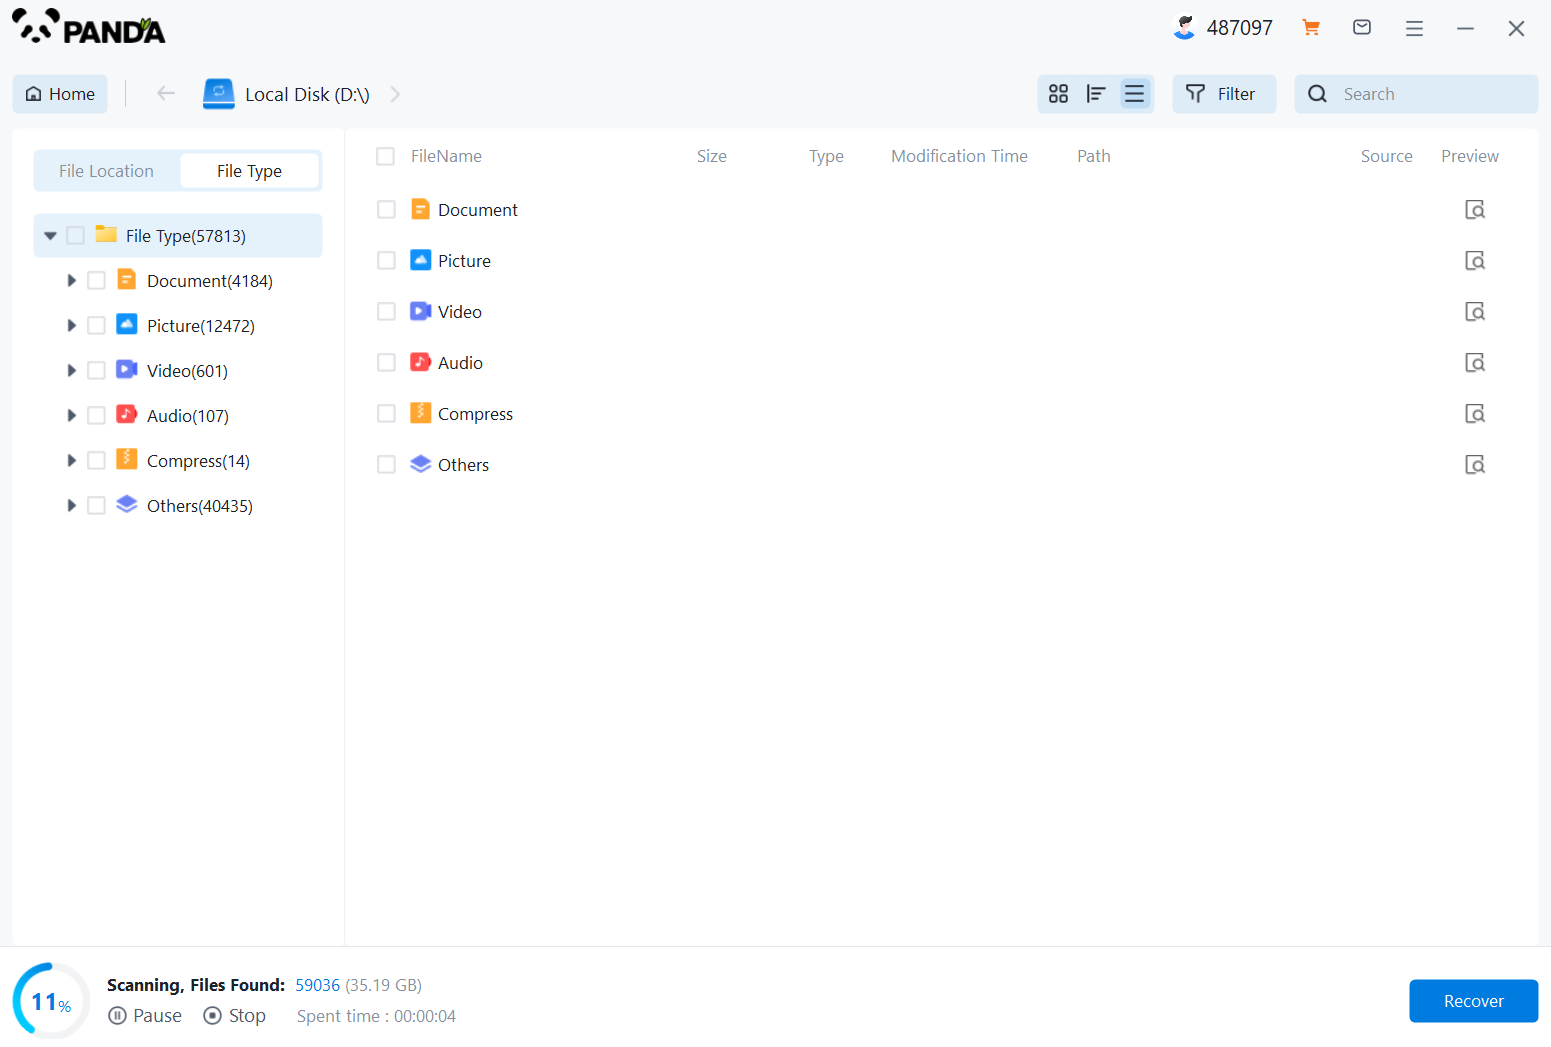
How to find the files you want to recover after the files are scanned, the fastest way is to search for the name directly.
Step 4: Preview and recover
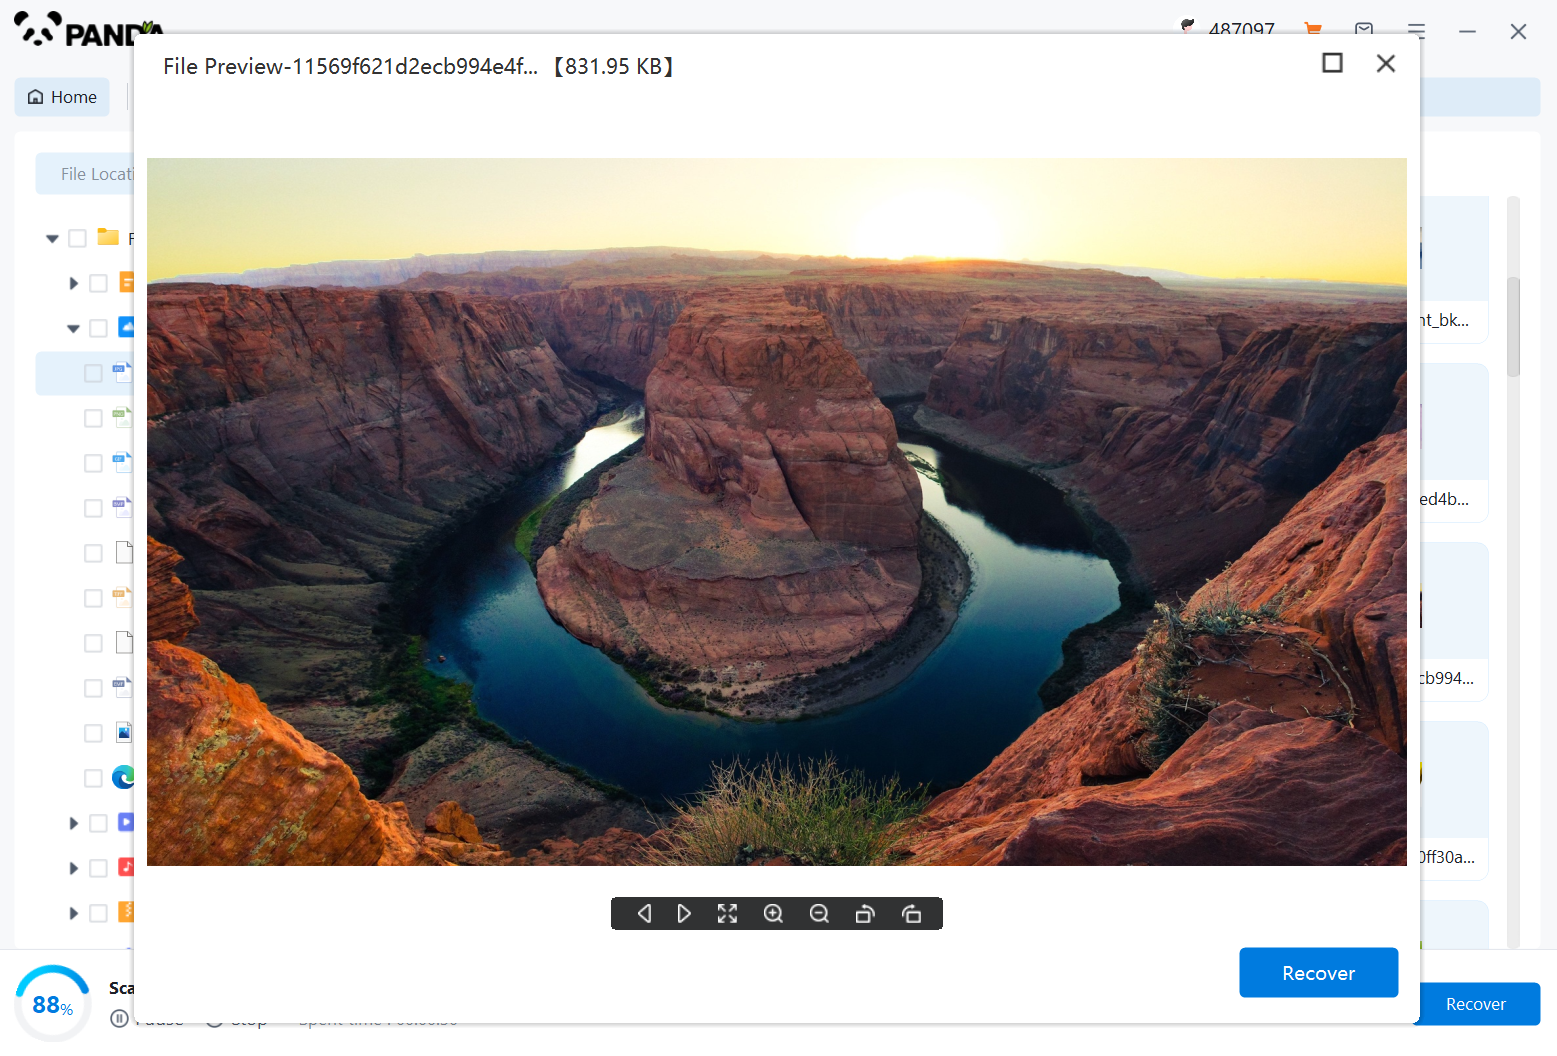
After finding the file, it is best to double-click to preview it, so that you can view the situation of the file, because if the file is damaged, it cannot be previewed, so that we can know in advance whether the file can be recovered normally, click Restore Now to recover.

4. Check Cloud Backups (If Applicable)
If you have backed up your files to a cloud service like OneDrive, Google Drive, or Dropbox, you can check these backups for the deleted files.
- Log into your cloud service account and navigate to the folder that contained the deleted files.
- Look for the files and restore them from the cloud to your local system.
Remember, the chances of successfully recovering deleted files depend on various factors, including the time elapsed since deletion and the amount of data written to the hard drive since then. Therefore, it's always best to act quickly and avoid overwriting the deleted files with new data.


