Recovering accidentally deleted files from a camera's SD card can be a stressful experience, but it's often possible with the right tools and techniques. Here's a step-by-step guide on how to recover deleted photos and videos from a camera's SD card:
Step 1: Stop Using the SD Card Immediately
The first and most crucial step is to stop using the SD card immediately after you realize files have been deleted. Any further writing to the card, such as taking new photos or videos, can overwrite the deleted files and make them unrecoverable.
Step 2: Connect the SD Card to a Computer
Connect the SD card to your computer using a card reader or by inserting it into a slot on your computer if it has one. Ensure that the card is properly seated and that your computer recognizes it.
Step 3: Choose a Reliable Data Recovery Software
There are numerous data recovery software programs available that can help you recover deleted files from an SD card. The following takes the operation of Panda data recovery software as an example.
Memory card data operation steps:
Step 4: Select USB flash drive/memory card recovery
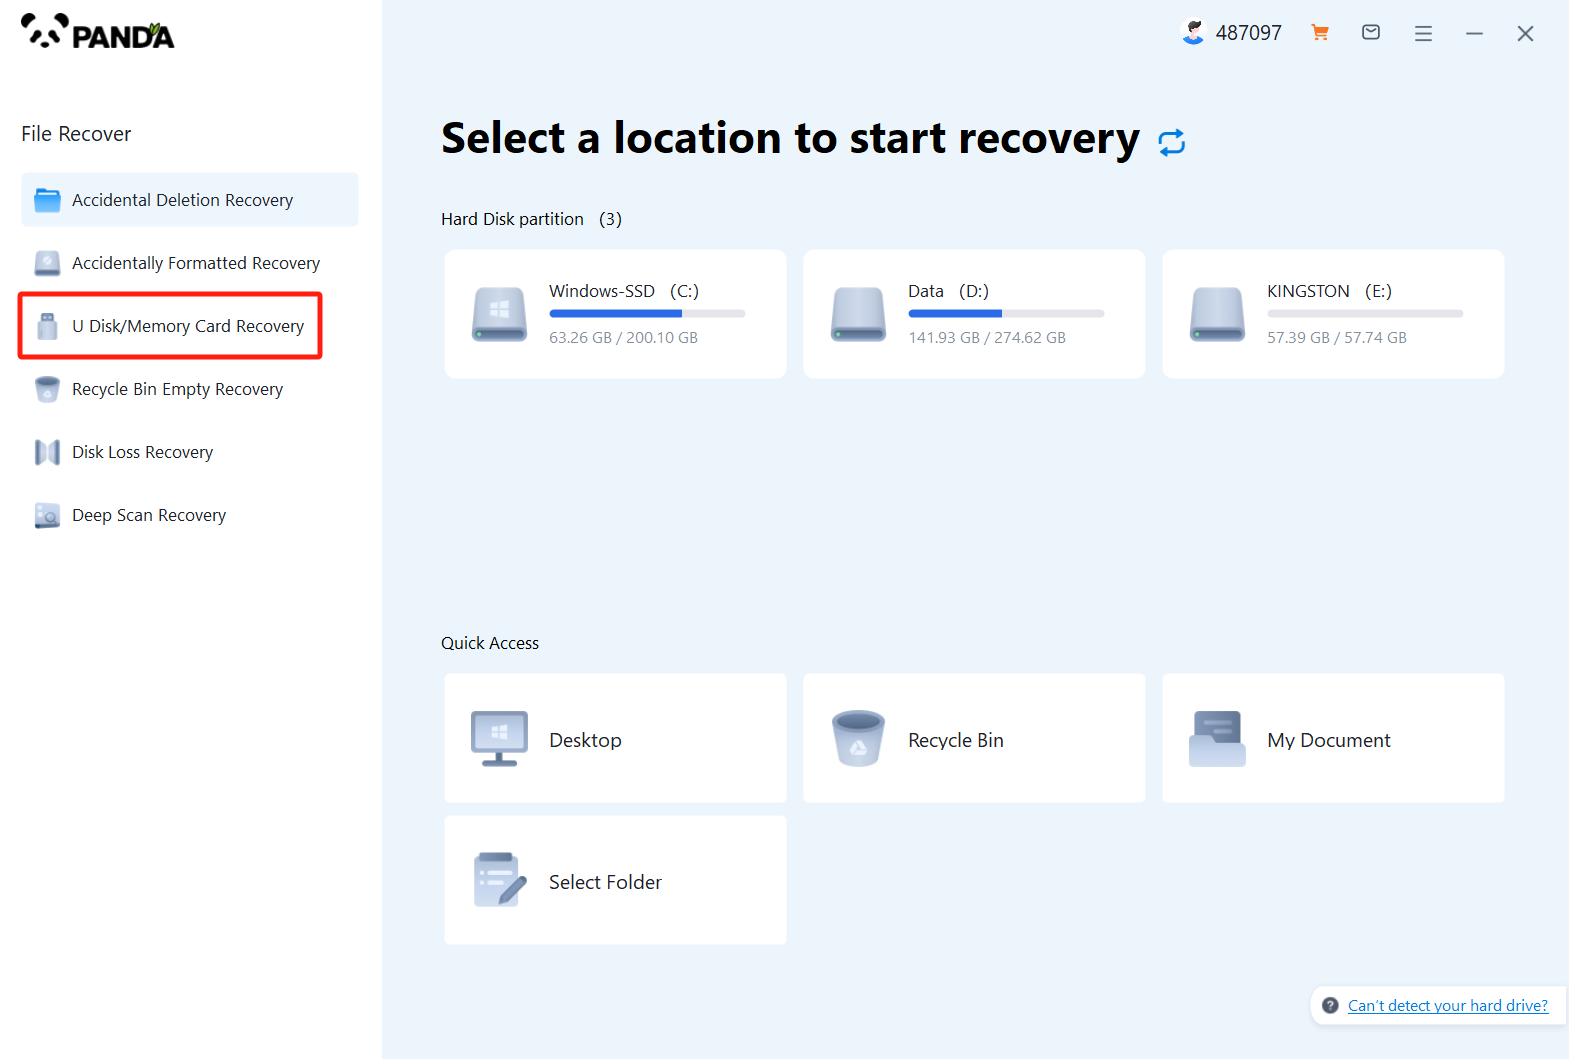
Since you want to recover the data of the memory card, then of course you have to choose "USB flash drive/memory card recovery".
Step 5: Select a memory card
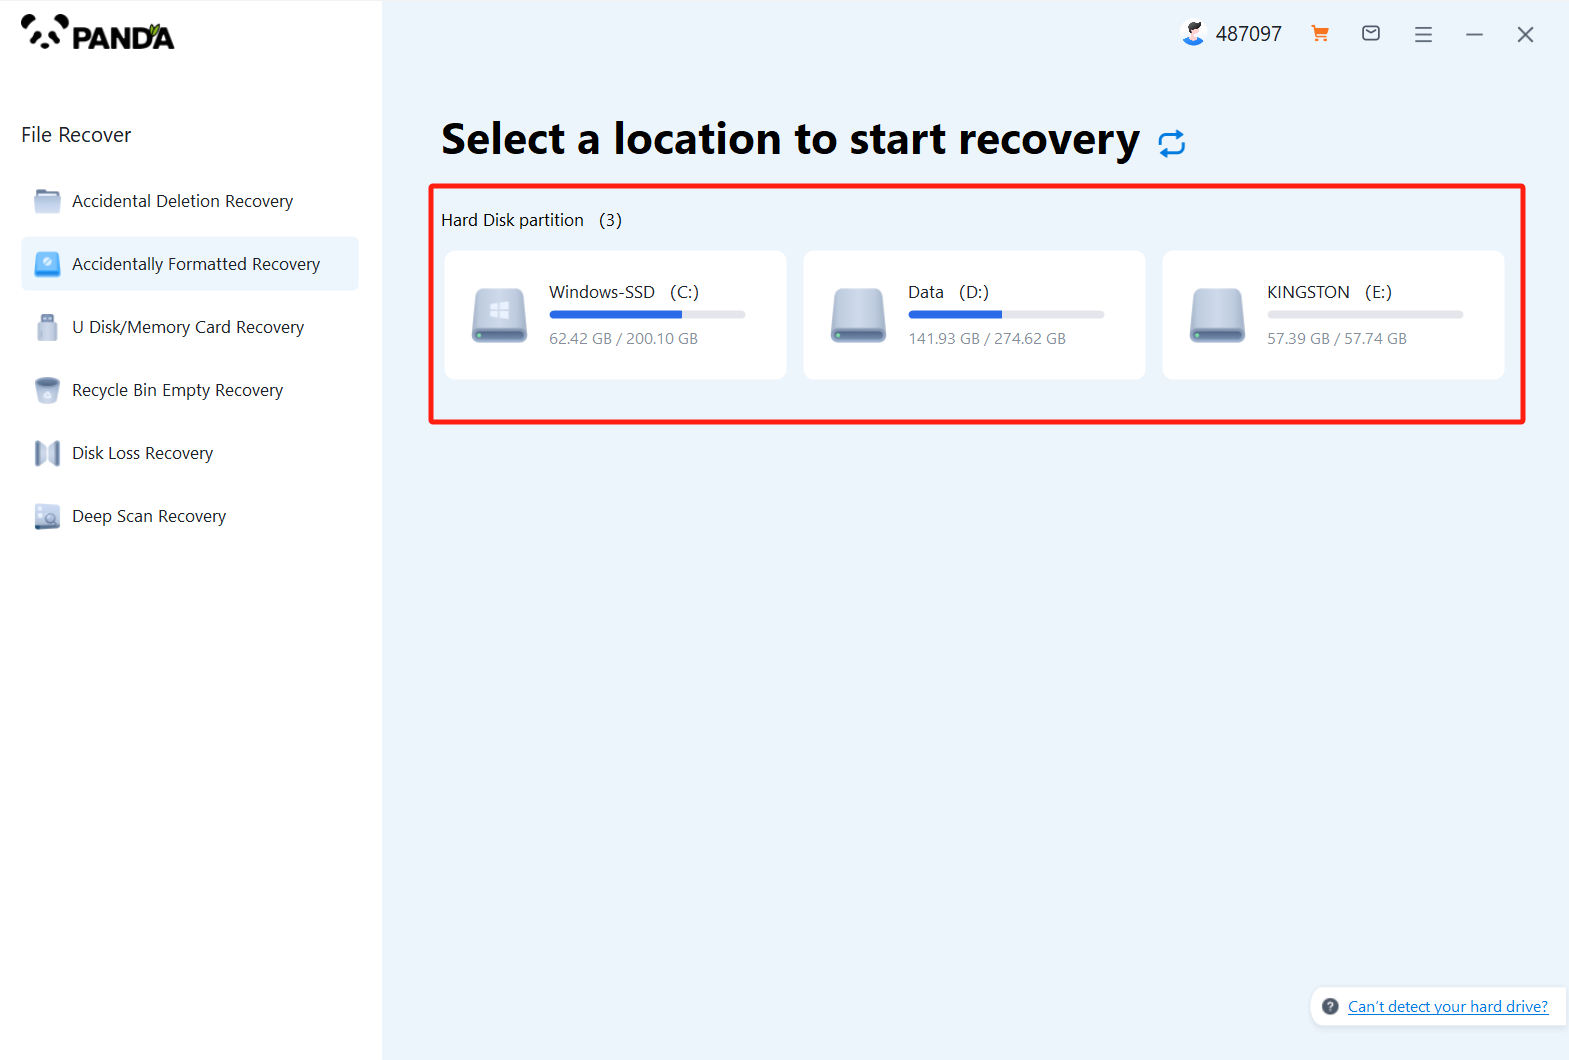
Connect your memory card to your computer with a card reader, then select it and click Start Scan.
Step 6: Scan the file
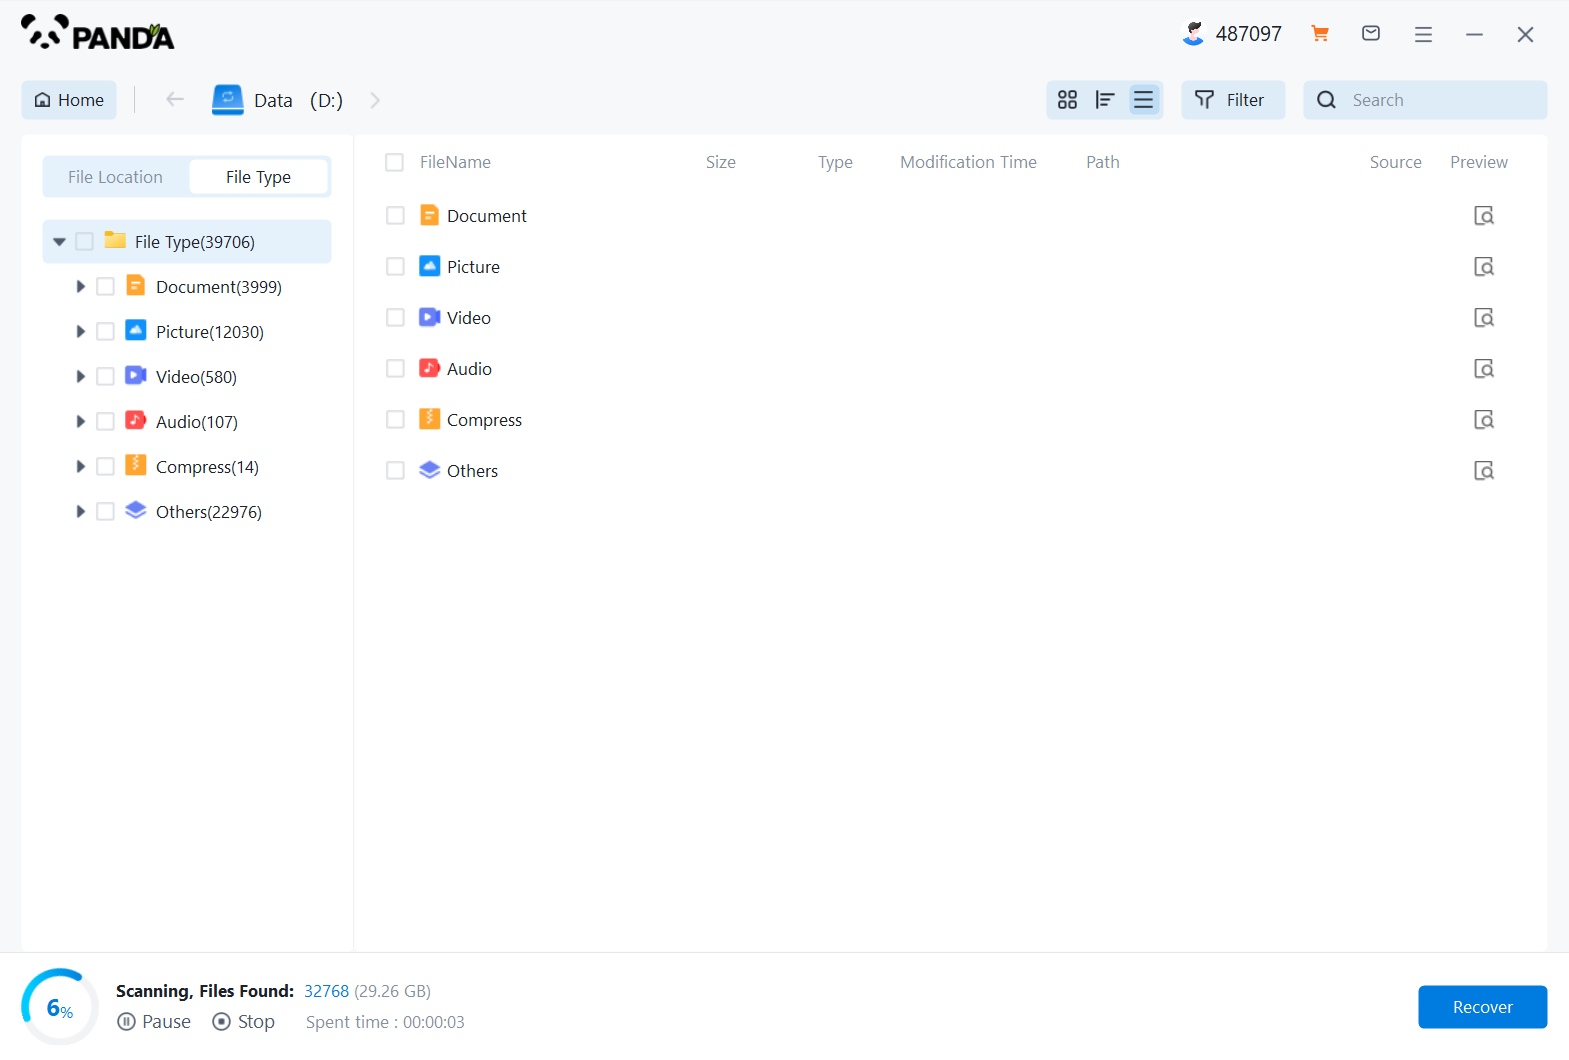
Scan the memory card data and wait patiently.
Step 7: Find the file
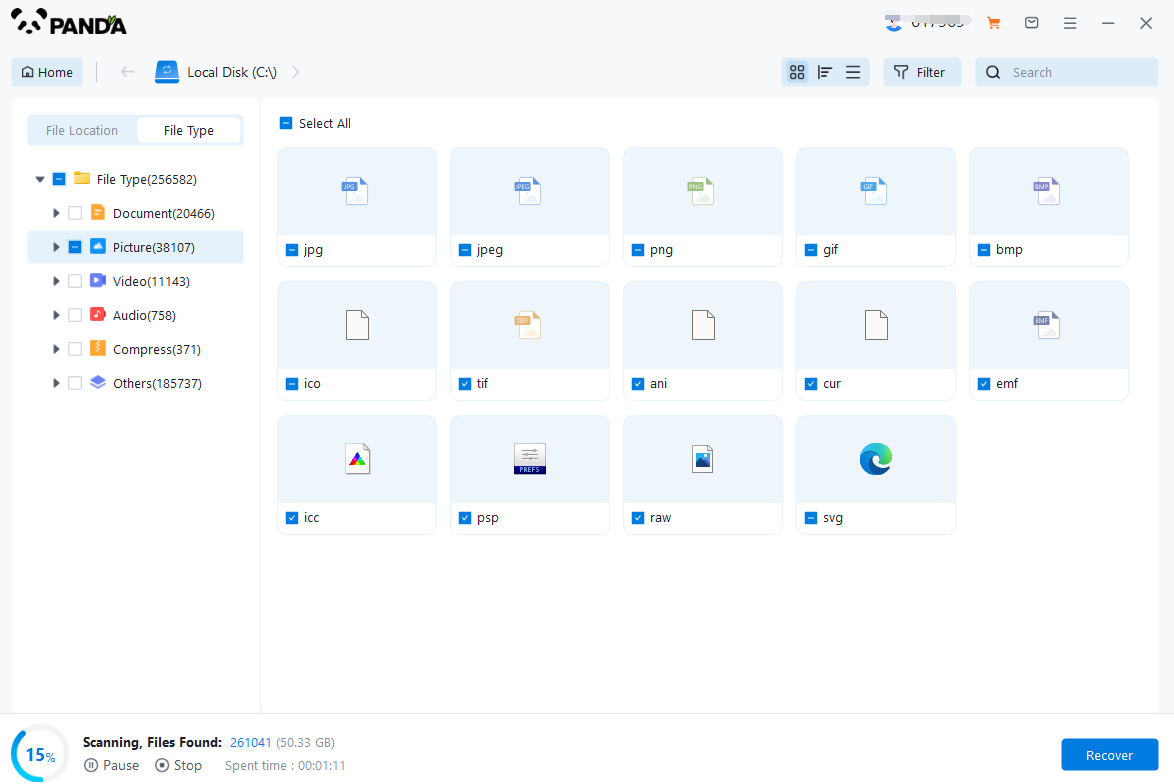
The fastest way to find a file is to search for the file name directly, or if you don't remember the name, you can also select the file type on the left to exclude it.
Step 8: Preview the recovered files
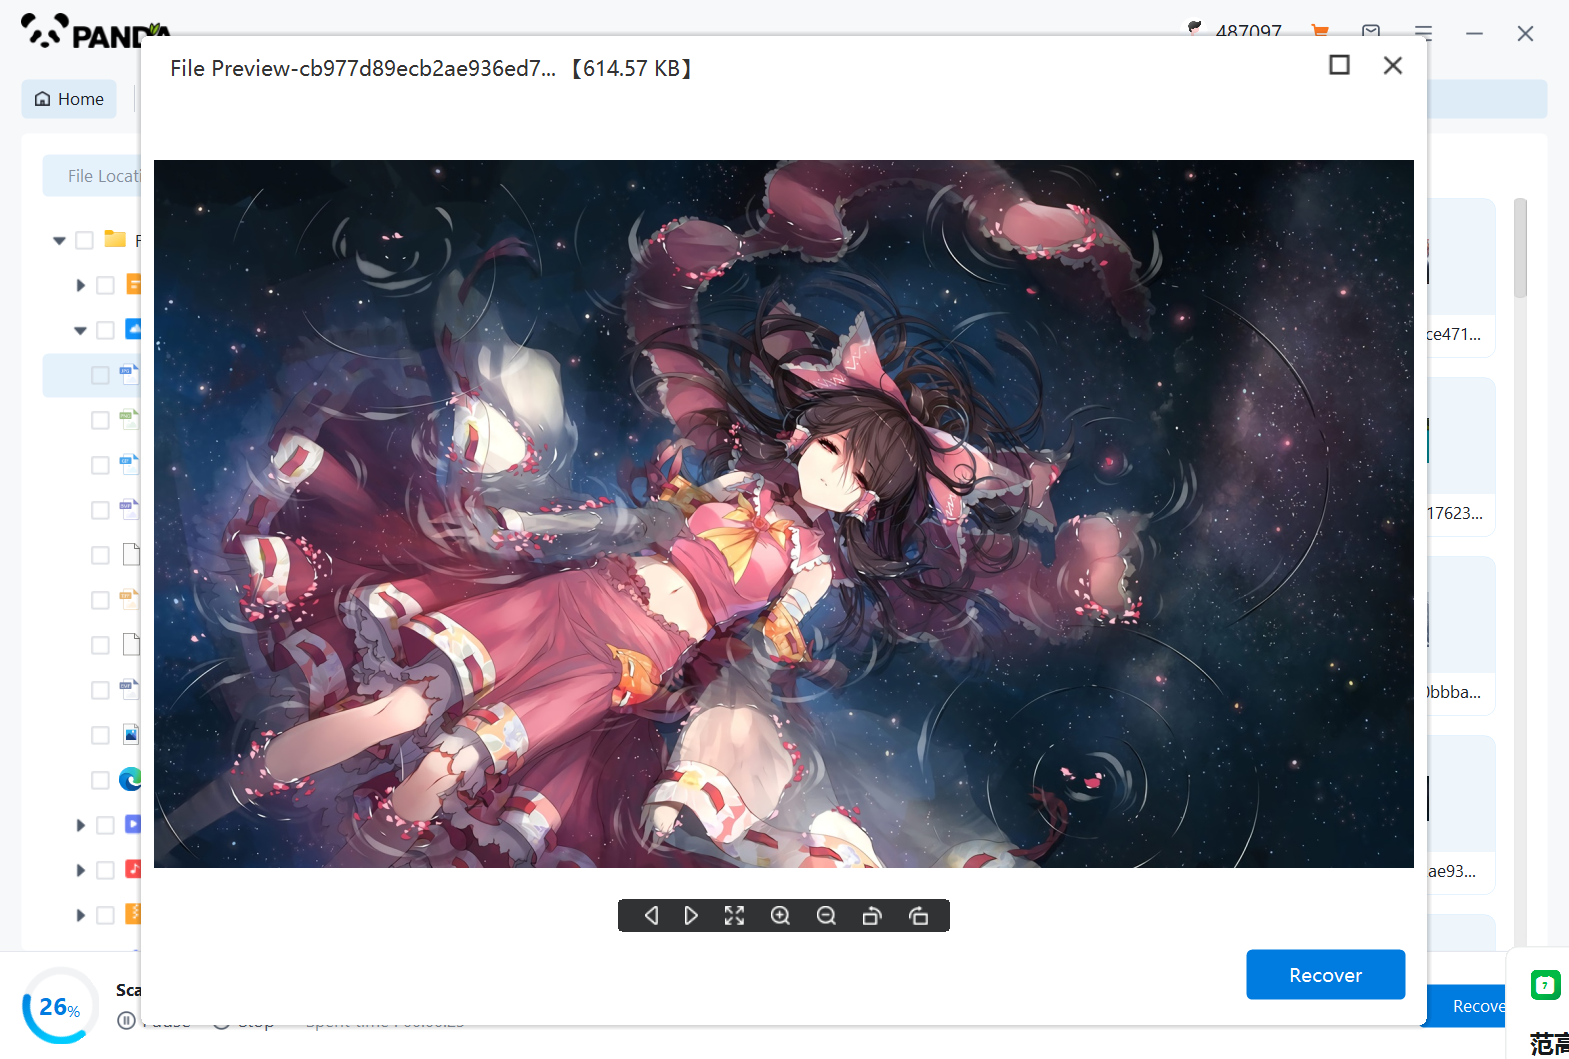
Once you find the file, double-click on the preview, and if you have no problem, you can click to restore it immediately.
Step 9: Scan the SD Card for Deleted Files
Launch the data recovery software and select the option to scan the SD card for deleted files. The software will begin scanning the card, searching for recoverable files. This process can take some time, depending on the size of the card and the number of files it contains.
Step 10: Select the Files You Want to Recover
Once the scan is complete, the software will display a list of recoverable files. Browse through the list and select the files you want to recover. You can use filters to narrow down the results and make it easier to find specific files.
Step 11: Choose a Destination to Save the Recovered Files
Select a destination on your computer where you want to save the recovered files. It's essential to choose a location other than the SD card itself to avoid overwriting any potentially recoverable files.
Step 12: Recover the Files
Click the "Recover" or similar button to begin the recovery process. The software will extract the selected files from the SD card and save them to the specified location on your computer.
Additional Tips:
- Backup Regularly: To prevent data loss in the future, make sure to back up your camera's SD card regularly. This can be done by transferring files to a computer, cloud storage, or an external hard drive.
- Use a Reliable Card Reader: A high-quality card reader can ensure a stable and reliable connection between your SD card and computer, reducing the risk of data loss.
- Handle the SD Card Carefully: Avoid bending, scratching, or exposing the SD card to extreme temperatures, as these factors can damage the card and make data recovery more difficult.
Remember, data recovery is not always guaranteed, especially if the deleted files have been overwritten. However, by acting quickly and using reliable software, you can often recover accidentally deleted files from a camera's SD card.


