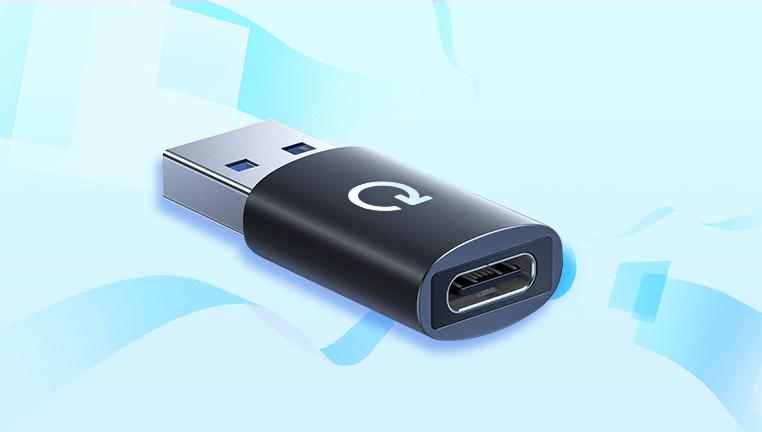
USB flash drives have become indispensable tools for everyday digital storage. They’re portable, reliable, and versatile. However, due to their constant use and frequent plug-ins and removals, they are also vulnerable to data loss. Accidentally deleting files from a USB flash drive can feel like a disaster especially when those files are important documents, family photos, or work-related projects. Fortunately, with the right approach, you can recover deleted files from a USB flash drive in many cases.
Before delving into recovery methods, it’s crucial to understand what happens when you delete a file from a USB flash drive. When you press “Delete,” the file doesn’t vanish immediately. Instead, the system removes the file’s reference in the drive’s file system, marking the space it occupied as available for new data. The actual data remains on the drive until it’s overwritten by new files. This delay gives you a window of opportunity to recover deleted content as long as you act quickly.

Common Causes of File Deletion
Data loss from USB flash drives can stem from a variety of causes. Understanding these helps prevent future losses and can also inform your recovery strategy.
Accidental Deletion – One of the most common reasons. You may delete the wrong file or format the drive by mistake.
Virus or Malware Attacks – Some malware is designed to delete or hide files.
Corruption – A corrupted file system can make files appear deleted or inaccessible.
Improper Ejection – Pulling out the USB drive without safely ejecting it can cause logical errors.
Physical Damage – Although more severe, physical damage can result in the loss of readable files.
Formatting – Quick formatting a USB doesn’t erase data immediately but does remove the file system structure, making it seem empty.
Steps to Take Immediately After File Deletion
Once you notice missing files, stop using the USB flash drive immediately. Do not save or add new files to it. This reduces the chance of overwriting the deleted data. Then, proceed with recovery using the following steps:
Method 1: Check for Hidden Files
Sometimes, files are not deleted but hidden due to malware or file system errors. Use this method to uncover them:
Insert the USB drive into your computer.
Open File Explorer and locate your USB drive.
Go to the View tab and enable Hidden items.
Check if the missing files are now visible.
If the files still don’t appear, move on to data recovery software.
Method 2: Use Data Recovery Software
Data recovery software scans the USB flash drive for recoverable files and helps you restore them. Below are steps using a typical recovery program:
Step 1: Download and Install Recovery Software
Choose reputable recovery software. Some reliable options include Recuva, EaseUS Data Recovery Wizard, Disk Drill, and Drecov Data Recovery. Make sure to install the software on a drive other than the USB flash drive to avoid overwriting deleted data.
Step 2: Launch the Program
Open the installed software. Most applications have an intuitive interface guiding you through recovery.
Step 3: Select the USB Drive
From the list of available drives, choose your USB flash drive. If the program doesn’t detect it, try unplugging and reinserting the drive.
Step 4: Scan the Drive
Choose between a quick scan or deep scan. Quick scan is faster but may not find all files. Deep scan takes longer but retrieves more data, especially from formatted or corrupted drives.
Step 5: Preview and Select Files
Once the scan completes, the software will list recoverable files. Many programs allow you to preview files before recovery, helping you ensure you're selecting the correct ones.
Step 6: Recover the Files
Select the files you want to restore and choose a different drive (not the USB drive) to save them. This ensures no data is overwritten during recovery.
Method 3: Use File History or Backup
If you had a backup system in place—like File History in Windows or Time Machine in macOS—you might be able to recover files even if they were deleted from a USB flash drive.
On Windows:
Connect the USB drive.
Go to Control Panel > System and Security > File History.
Click Restore personal files and navigate to the backup.
Browse through the history and select the file(s) to restore.
On Mac:
Connect the USB drive.
Launch Time Machine.
Navigate to the location of the deleted file.
Use the timeline to go back in time and restore the file.
Note: This only works if the USB flash drive was included in your backup strategy.
Method 4: Command Prompt (Windows Only)
In some cases, particularly when dealing with corrupted files or hidden files, the Windows Command Prompt can help:
Type cmd in the Start menu and run it as administrator.
Enter the command:
chkdsk E: /f
(Replace E: with your USB drive letter.)
Once the scan completes, enter:
attrib -h -r -s /s /d E:\*.*
This command attempts to fix file system errors and make hidden files visible.
Method 5: Consult a Professional Recovery Service
If your USB flash drive is physically damaged or the data is extremely valuable, it may be best to consult professional recovery services. These services can often recover files from drives that software cannot access.
However, they can be costly, and recovery is not guaranteed. Make sure to get an estimate before proceeding.
Tips to Maximize Recovery Success
Act Quickly: The longer you wait, the greater the chance that deleted files will be overwritten.
Avoid Writing New Data: Don’t copy anything to the USB drive before recovery.
Use Trusted Software: Avoid downloading unknown or unverified tools that might install malware or damage your drive further.
Use Deep Scan Options: If the quick scan fails, deep scans often retrieve more data.
Store Recovered Files Safely: Always save recovered files to a different storage location.
Preventive Measures for the Future
While recovery is often possible, prevention remains the best strategy. These tips will help you avoid future file deletions or data loss:
Back Up Regularly
Maintain regular backups of important files using external drives or cloud services.
Safely Eject USB Drives
Always use the “Eject” or “Safely Remove Hardware” option before unplugging a USB drive.
Use Antivirus Protection
Keep your system and USB drives scanned and protected to avoid malware-related data loss.
Avoid Frequent Formatting
Frequent formatting can reduce the drive’s life and increase the chance of accidental data deletion.
Organize Files Properly
Keeping files well-organized reduces the chances of mistakenly deleting them.
Label Important Files
Clearly labeling or flagging important files can prevent accidental deletion during cleanup.
Signs That Recovery Might Not Be Possible
While many file deletions are reversible, there are scenarios where recovery becomes nearly impossible:
Extensive Overwriting: If you’ve used the USB drive heavily after deletion, the lost files may have been overwritten.
Severe Physical Damage: Cracked or broken USB ports or chips can render the drive unreadable.
Low-Quality Drives: Some low-cost USB flash drives are more prone to data corruption and unrecoverable failures.
Prolonged Use After Deletion: The longer the time since deletion, the higher the chance that recoverable sectors have been overwritten.
Even in these situations, professional services may still recover some data, but there's no guarantee.
Losing files from a USB flash drive can be stressful, but it’s not always a permanent loss. With prompt action, the right tools, and careful handling, recovery is often achievable. From simple hidden file checks to using professional-grade recovery software, there are multiple paths to restoring your data.
More importantly, this experience can serve as a wake-up call to implement better data protection habits. Whether through automated backups, proper drive handling, or antivirus solutions, taking proactive measures ensures you’re less likely to face the same issue again.


